How to install sod in Portland Oregon!
Have you been eyeballing your landscape, wanting a green lawn in a snap? Sod offers a unique quality by instantly providing a luscious green lawn in a day. Below we have detailed out how to install sod in Portland Oregon.
Choose your area where you want to install sod and measure the length and width and multiply them together to get the square footage (Length x Width = square feet). You may use a tape measure or a measuring wheel. You will use the measurement to order the correct amount of sod, amendments and lime.
EXPERT TIP: Choose sod based on light exposure. For full sun order a perennial rye sod, for shade order a tall fescue sod.
To ensure weeds do not overtake your sod we recommend using a non-selective herbicide to spray the entire area, wait 10-14 days and repeat a second time. This is usually sufficient to kill off weeds.
EXPERT TIP: After the initial spraying you can fertilize the soil and water it to encourage any dormant weed seed to spout before the second spraying occurs. Only do this 4 days after first spraying (getting recently sprayed weeds wet immediately after application dampens the effects).
Rototill the sod area at approximately a 6-8″ depth, prior to any amendments being installed. Tilling alleviates soil compaction, bonds the subsoil with topsoil (to be installed) and improves water movement.
EXPERT TIP: Steps 2 & 3 should be repeated again before moving onto step 4. This greatly reduces weeds from overtaking the new sod.
Rough grade the entire area where sod is to be laid with your grading rake. Slope down from house and buildings. Fill in low lying areas, divots and reducing severe slopes.
EXPERT TIP: The use of hand tools with grading should be attempted if the grading to be performed is minor. For drastic grading, it is best to contact a professional as incorrect grading introduces a host of future problems.
Add a layer of 3-way (balanced mixture of sand, soil and compost) soil at a compacted depth of 4-6″. Rake with a grading rake to evenly distribute the topsoil while sloping away from structures.
EXPERT TIP: Soil will typically compact by 2″ inches; therefore, add approximately 6-8″ of topsoil. To raise the grade raise, apply an additional 2-4″.
Using your hand or walk-behind spreader, apply lime and starter fertilizer to top soil, prior to sod installation. Lime rate is 50 lbs per 1,000 square feet. Follow the application rate on the fertilizer directions.
EXPERT TIP: Lime often clogs spreaders (especially a hand spreader). You may want to keep a hand trowel close by to break up clumps of lime as needed.
Using your turf roller (filled with water about 1/3 full), roll the area cross directionally, revealing low spots and compact the soil. Fill any exposed low spots with soil while diligently matching the grade of the surrounding area.
Order enough sod to cover the desired area, using your calculation of length x width. If possibly we highly recommend having the sod delivered the same day you are installing it.
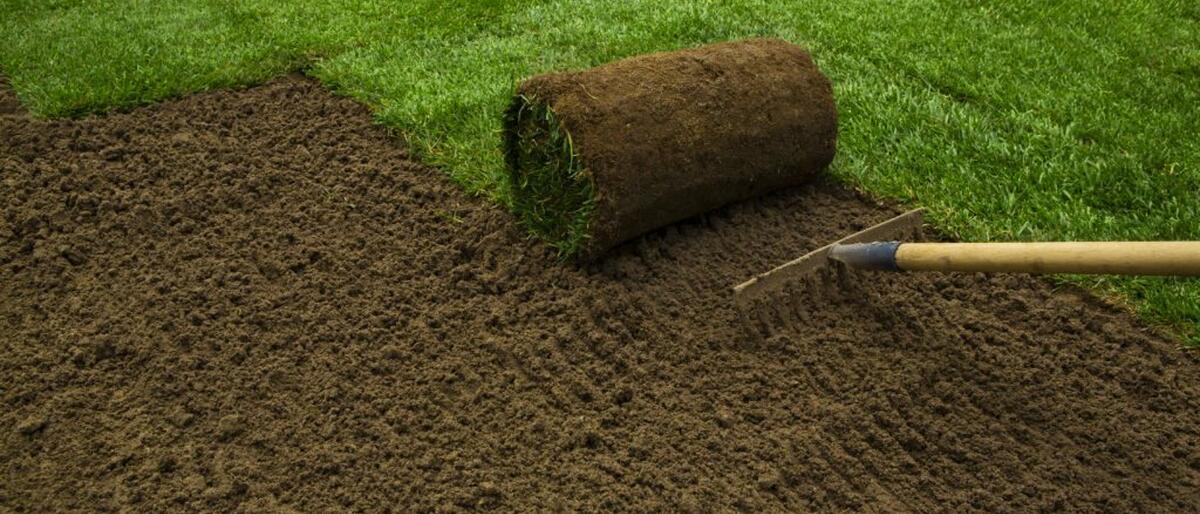
Lightly fluff the soil with a rake prior to laying sod. When laying sod you want to stagger the seams and make sure the patches are tightly pressed together. Leave them as square edges for now until you are completely finished laying the sod. Once your area is completely covered, take a edging shovel and round the edges of the sod to your preference. Use the weed-eater to do a final shaping to lose blades, this will give the edge a polished look.
EXPERT TIP: Water within 30 minutes of installation-sod dries out quickly.
Irrigate your new lawn by watering once per day for 30 minutes. Do not allow the sod to dry out. However, this does depend on the current weather. In Portland Oregon we typically see warm summers, so keep an eye on your lawn and increase or decrease watering as needed. You want to avoid heavy use for about 3 weeks.
EXPERT TIP: Water within 30 minutes of installation-sod dries out quickly.
Overtime your newly installed green lawn will began to look yellow and ragged if not routinely cared for. Protecting your investment (time and money) can be accomplished by regularly aerating and overseeding, along with regular fertilization. This should be done annually or biannually. Check out our blog on how to do this by clicking here.

Erica is an avid lover of the outdoors, and transformed that love into a partnership running Valley West with Ryan 2012.